Creating and processing orders for wedding rings and special orders
Creating and processing orders for wedding rings and special orders
1. Recording the order at the POS
To record an order at the POS, a customer is required first. The order is linked to the selected customer, so all information can be easily and clearly retrieved later.
- In the top right of the POS screen, you can select an existing customer or create a new one.
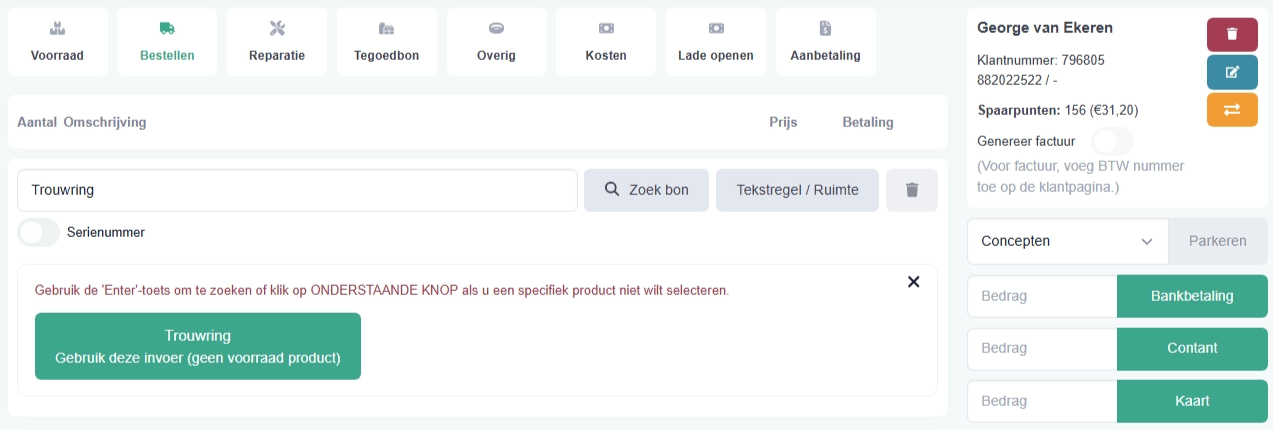
- After selecting the correct customer, click on "Order" in the menu bar. The button will be highlighted in green, indicating that order mode is active.
- Then, in the input field next to "Transactions", enter the desired item name, for example, "Ladies' wedding ring" or "Wedding ring".
- If no stock item is selected, a green button with the entered item name will appear below the input field. Click this button to add the entry as a free order line. The item will then be linked to the order and can be further supplemented with additional information later.
2. Selecting supplier and brand
After selecting the order item, the "Select supplier and brand" window opens.
- Here, select the supplier from whom the wedding rings were ordered or configured. This supplier will be linked to the order and is important for ordering, follow-up, and processing.
- In the "Supplier" field, choose the correct supplier. In this example, it is "August Gerstner Ringfabrik GmbH & Co KG".
- If necessary, a brand can also be selected in the "Brand" field. This is only required when it is relevant to the order.
- Then click the green "Select" button to confirm your choice and proceed.
Important
It is possible that this window does not appear for you. Entering a supplier and brand for an order is not mandatory, but it is important for accurate statistical breakdown. This window can be activated in Settings -> Shop Settings -> POS Tab -> POS Actions -> Repairs and Orders.
3. Entering item and price
After selecting the supplier and, if applicable, the brand, you will enter the item screen. Here you can further complete the order.
- The "Name" field displays the item description. This can be adjusted, for example, to "Wedding Rings 2".
- Next to the name is the Bag Number. This field is optional and can be used for an order number or reference.
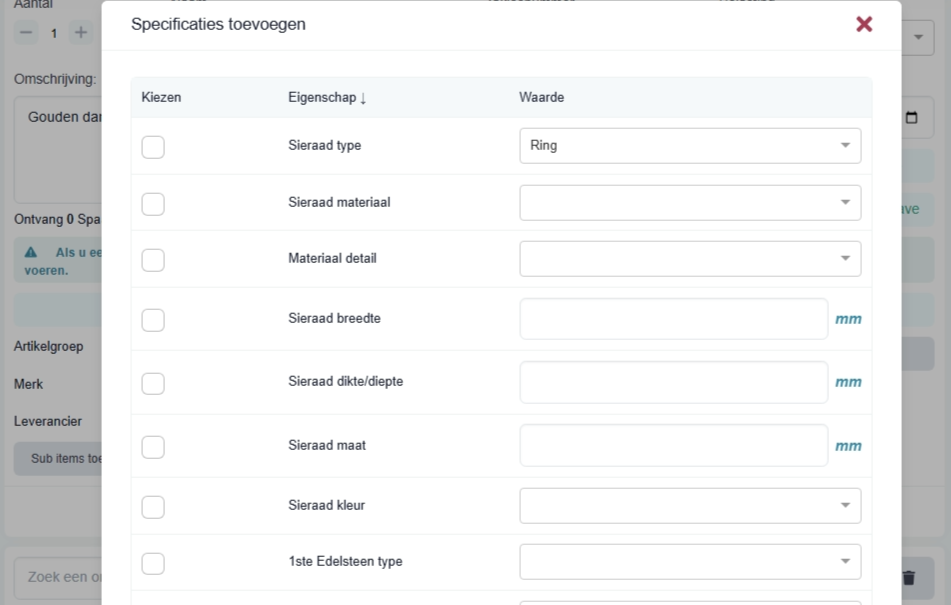
- In the "Description" field, you can add extra information, such as material, alloy, ring type, or customer preferences.
- For structured input, you can use "Add specifications" to record details clearly.
- If an image or PDF is available (e.g., a configuration from the supplier), click "Upload" to add it.
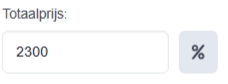
- In the "Total price" field, enter the selling price or catalogue price.
- If you want to give a discount, click the grey button with the percentage sign (%). Here you can enter a discount percentage or an adjusted price.
- In "Planned delivery date", enter the date when the rings are expected.
- The "Pay later" toggle is on by default. If a deposit needs to be made, slide it to the left. An additional field for the deposit amount will then appear.

4. Entering deposit and completing payment
After entering the deposit, you can register the payment methods on the right.
- You can split the amount across multiple payment methods. In this example, €1,000 is paid via bank and €500 in cash.
- Enter the amounts and click "Payment / complete".
- Then, in the payment window, check if everything is correct and confirm with "Continue".
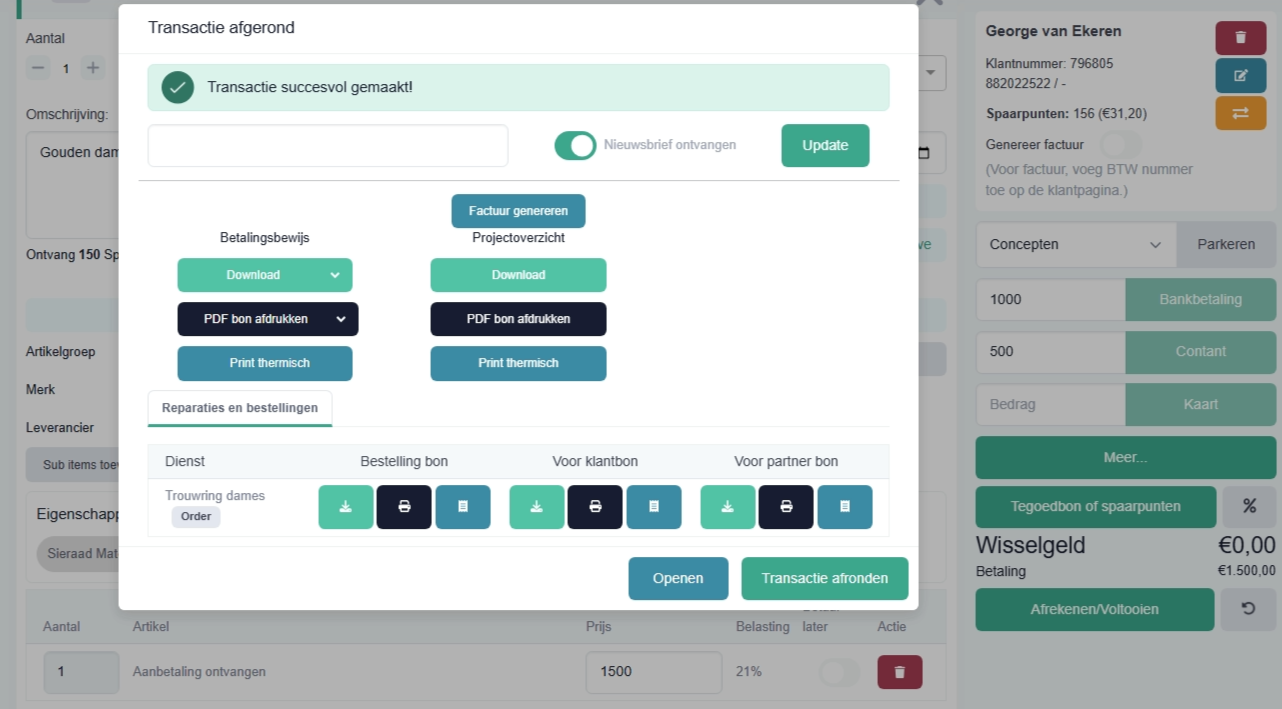
After completion, "Transaction completed" appears. Here you can:
- download payment receipt
- send by email
- generate deposit invoice
The deposit invoice will display the purchased product with relevant pricing information. This includes the original selling price, any reduced price, and the deposit already paid. This provides the customer with clear and transparent insight into which item was purchased, the total agreed price, and the amount already paid as a deposit. If an email address is linked, the invoice can be sent directly.
Close the transaction with "Complete transaction". The deposit invoice shows price, discount, and amounts already paid.
5. Production module for order processing
After an order has been registered at the POS and a deposit has been recorded, the order can be further processed in the Production module.
The Production module is designed to manage orders clearly, control them, and guide them through the various processing steps. This module is particularly useful for wedding rings, special orders, individual custom orders, or repair orders, as all important information is centrally available in one place.
In the Production module, you can check, among other things:
• which customer placed the order • which item was ordered or needs to be manufactured • which supplier or service partner is linked • which description, specifications, or files belong to the order • what price was agreed upon • whether a deposit has already been made • when delivery is planned • what the current processing status of the order is
The module helps you maintain an overview of outstanding orders and ensures that no important steps in the process are forgotten.
5.1 Overview of orders in the Production module
In the Production module, you will see an overview of all registered orders. The orders are displayed in a list and can be searched, filtered, and opened there.
Each order is assigned a unique sequence number. This number allows the order to be uniquely identified and easily retrieved later.
In the transaction number column, you will see the corresponding transaction. If multiple lines are displayed for one transaction number, it means that the order was later modified or extended. This can happen, for example, when additional items have been added to the order.
In addition, other important data is shown in the list:
• bag number (order) • order type • creation date • status • customer
This information allows you to quickly see which order it is and what stage of processing it is in.
To open an order, click the "View" button in the actions column.
The order will then open. Here you can view, supplement, and further process the existing information.
6. Editing orders
In the Production module, you can open and further edit an individual order. The detailed view shows all important order information in one overview.
The order number is displayed in the top left, for example, A1842-150626-1949. This number serves for the unique identification of the order.
Directly below it are various icons for further processing, such as:
• download • print • send by email
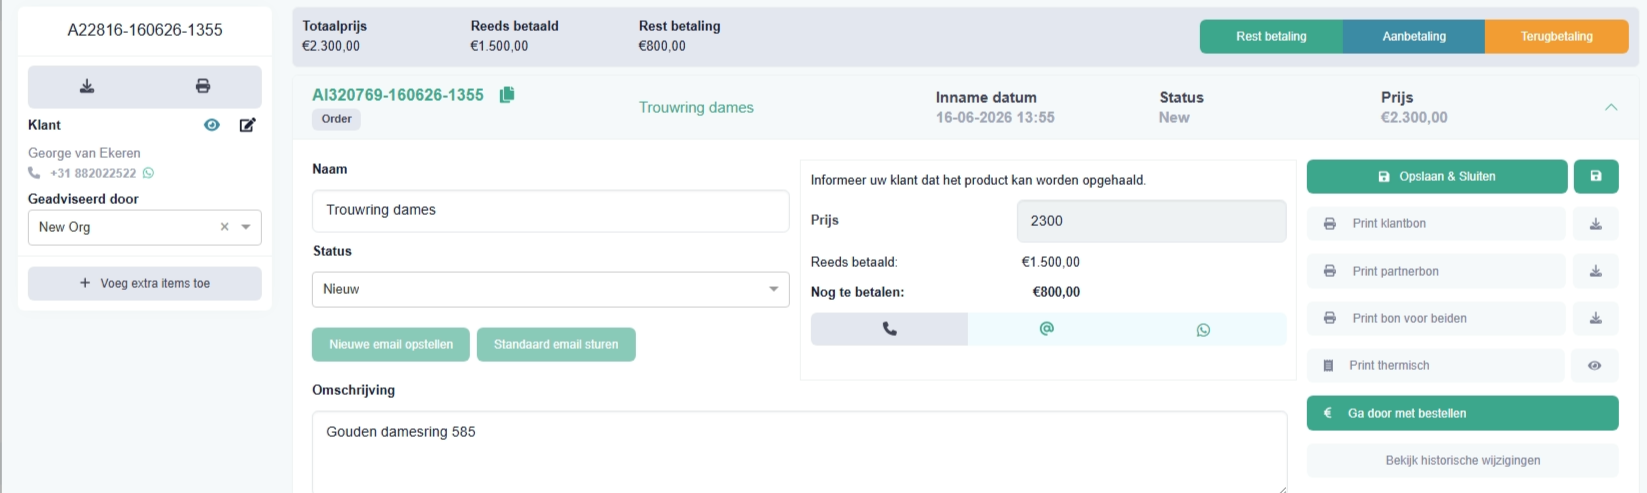
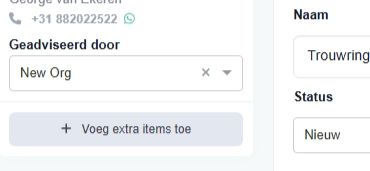
On the left, the customer details are displayed. It also shows which employee advised the customer.
Below the customer details is the grey button "Add extra elements". This allows additional items or services to be added to an existing order.
This is useful, for example, when an extra item needs to be added to a wedding ring order later, such as a diamond, engraving, additional piece of jewellery, or supplementary service.
When you click "Add extra elements", the POS opens. There you can register the extra item and link it to the existing order.
All transactions belonging to this order will then be displayed in the order. This always provides insight into which items, changes, or additions have been made to the order.
The payment status is also displayed at the top of the order. Here you can see the total amount, the amount already paid, and the outstanding amount. This always makes it clear how much still needs to be paid by the customer.
In the order overview, you can also inform the customer about the status of the order via email. The buttons "Send standard email" and "Compose new email" are available for this.
To do this, select the correct status from the dropdown under the "Status" field and then click, for example, "Send standard email". This way, the customer is quickly and easily informed about the progress of the order.
In the "Inform your customer that the product can be collected" section, you will see the most important payment information. Here, the price, any deposit, and the outstanding amount are displayed.
In the middle section, you can add extra items to the order or modify existing data via the orange "Add / modify" button.
The history of an order can be viewed via the "View change history" button. There you can see which changes have been made to the order.
7. Adding extra elements to an order
If extra items or services need to be added to an existing order, you can do this via the "Add extra elements" button.
After clicking this grey button in the order overview, PrismaNote automatically switches to the POS module. The existing order remains linked in the background.
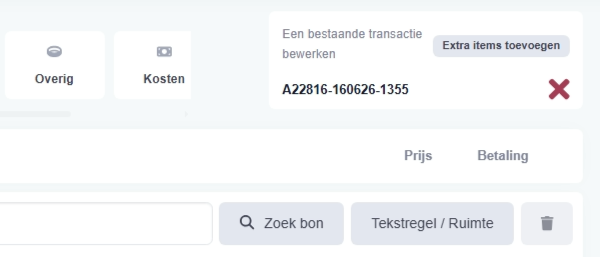
The corresponding order number is displayed at the top of the POS screen. This immediately shows that the newly entered item is being added to the existing order.
You can then register the extra item in the POS in the usual way.
Enter the item, price, and any additional data. Then complete the transaction via payment.
After completing the payment, the invoice can be printed or sent to the customer by email. The invoice will separately display the extra item sold, including description, price, VAT, and payment method.
This allows existing orders to be extended afterwards, without having to create a completely new order.
8. Order overview and remaining payment
When you return to the Production module after adding extra items and open the order via "View", you will see the complete order overview.

The order overview displays all components belonging to this order. In this example, the order consists of two components:
- The original wedding ring order
- The later added item, for example, the diamond
At the top of the order, the payment situation is clearly displayed. Here you can see the total amount, any discount, the amounts already paid, and the outstanding remaining amount. In addition, it remains possible to add supplementary products or services to the existing order via the "Add extra elements" button.
Additional actions can be added to the order via the "Remaining payment", "Deposit", or "Return / take back" buttons.
- If you want to collect the outstanding amount, click "Remaining payment". PrismaNote will then automatically open the POS and directly fill in the outstanding amount.
- Each order also has a barcode. When you scan this barcode at the POS, the POS will open immediately, and the outstanding remaining payment will automatically appear.
- The remaining payment can then be settled as usual via any payment method, such as bank payment, cash, debit card, webshop, or card payment.
After completing the payment, the order is automatically updated, and the remaining payment is registered as settled in the system.
Was this article helpful?
Another question?
Ask Linde — answers come with sources.