Upload/import purchase order invoice
Important
Are you following the steps in the video above? Don't forget to switch OFF the 'first toggle' at 0:55 minutes if you want to use the sales prices from the PDF instead of your current sales price.
Import digital invoice
Do you work with a digital invoice (a .TXT, .XML or .DAT file) or have you received a PDF invoice? You can easily import it. A scanned PDF will not work.
- 1
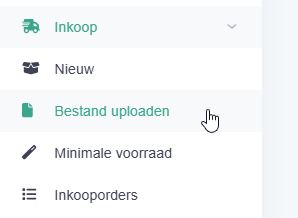
In the menu, under ‘Purchasing’, click ‘Upload file’
- 2
Search for and select the desired supplier in the field that appears.
- 3
Click the button to indicate the file format.

- 4
Click the text 'Select file'

- 5
Select the file on your computer and wait for the next screen to appear.
- 6
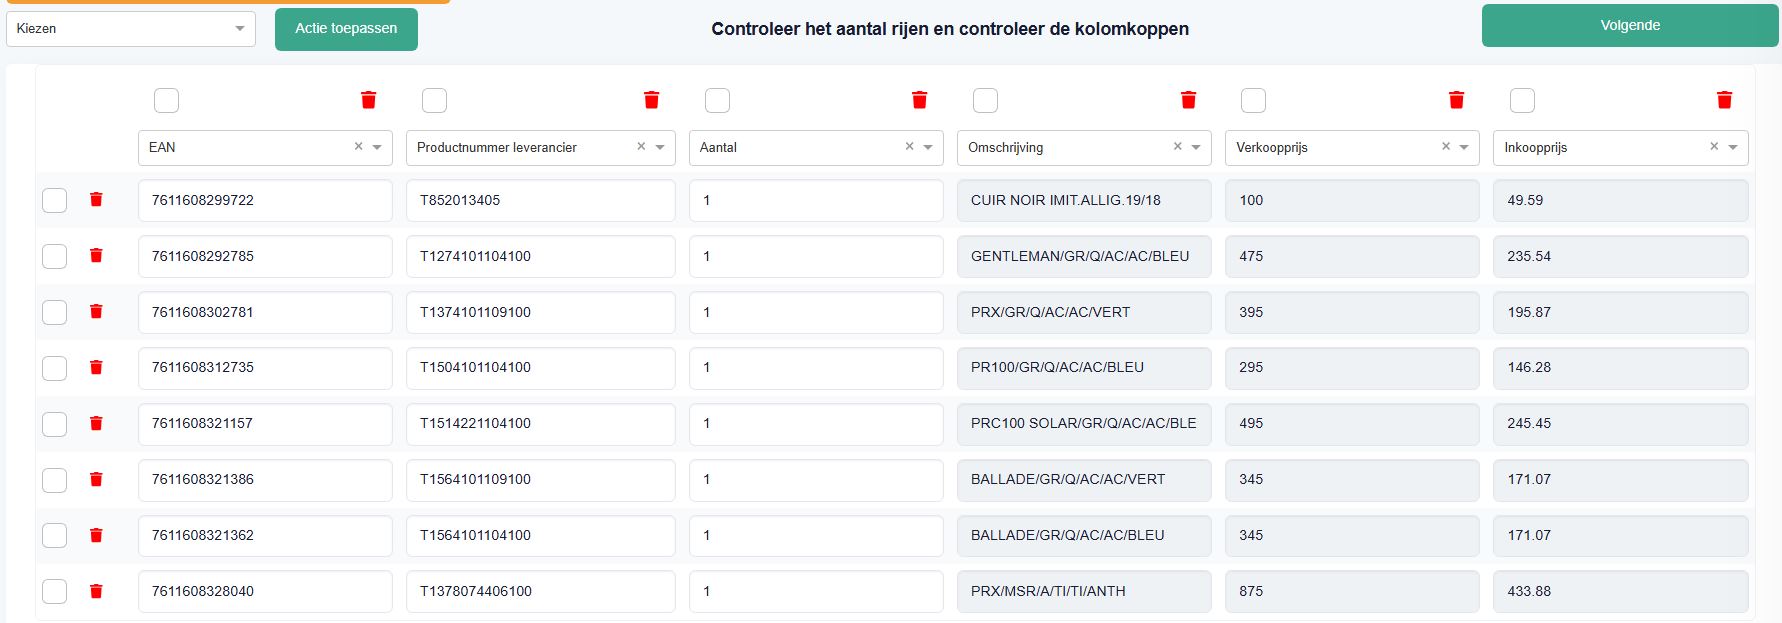
Check if the data has been transferred correctly
If the invoice has not been transferred correctly, please see the solutions at the bottom of this page.
- 7
Click the green 'Next' button in the top right.
If it is not possible to click Next at this step, check if the product number, purchase price, quantity and item description (name) fields are selected and all filled in.
- 8
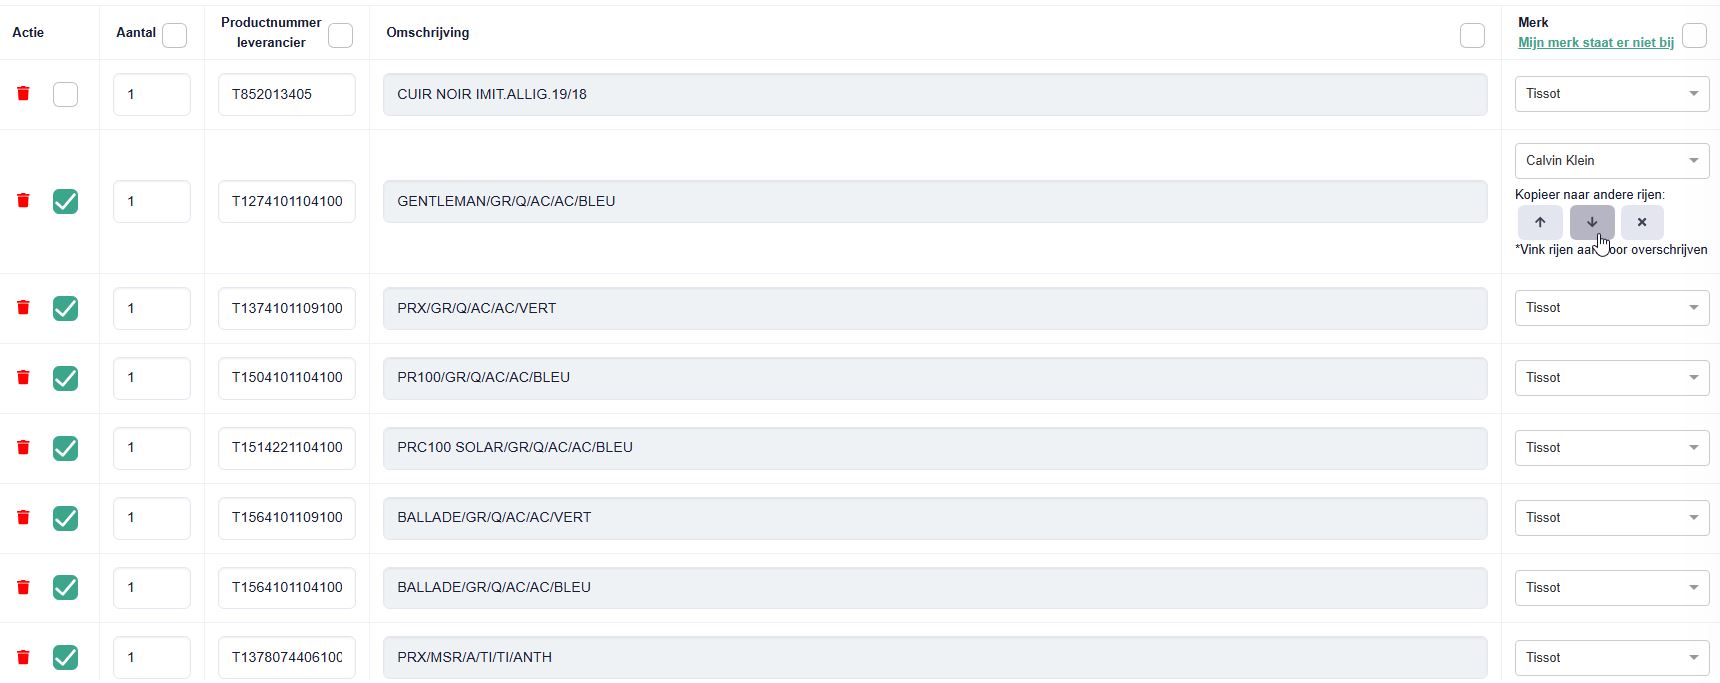
Select the brand for each product. By working from top to bottom, different brands can easily be added.
(see image) By selecting the first brand and then clicking the arrow icon, all products will be assigned this brand. Select a different brand from the desired row, click the checkbox in the Action column (next to the bin icon) and click the arrow icon.
Is the correct brand not listed yet? Click the text 'My brand is not listed' and open PrismaNote in a new tab. Then add the brand via the Inventory -> Brands menu.
- 9
Click the 'Next' button at the top.
- 10
A new screen appears. Check the toggles and click Next.
Switch OFF the 'first toggle' if you want to use the sales prices from the invoice instead of your current sales price. Most jewellers leave the other toggles ON by default.
- 11
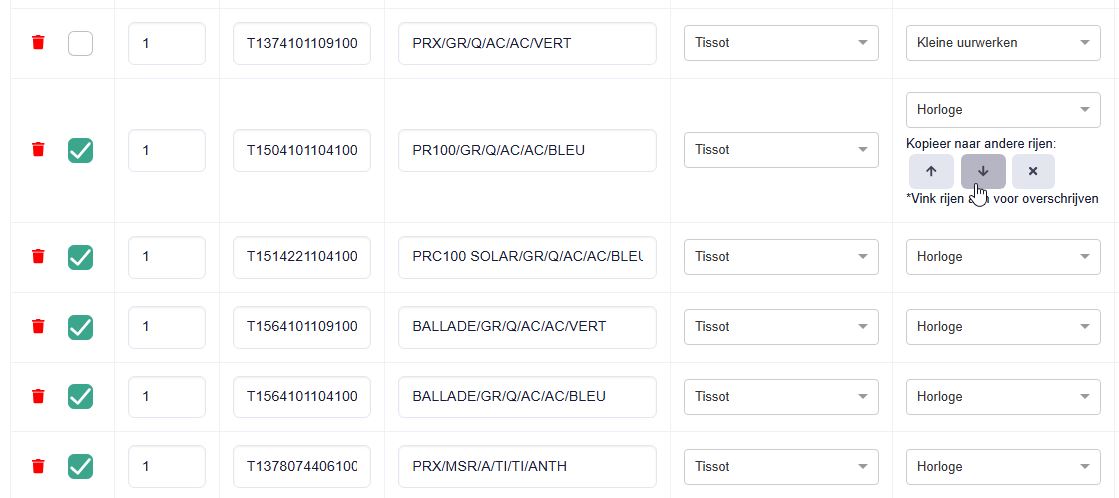
Select the item group for the product. By working from top to bottom, different item groups can easily be added.
(see image) By selecting the first item group and then clicking the arrow icon, all products will be assigned this item group. Select a different item group from the desired row, click the checkbox in the Action column (next to the bin icon) and click the arrow icon. Repeat this until you reach the bottom.
Is the correct item group not listed yet? Click the text 'My item group is not listed' and open PrismaNote in a new tab. Then add the item group .
- 12
Click the 'Import' button at the top.
In the next step, you can enrich products with more information.
- 13
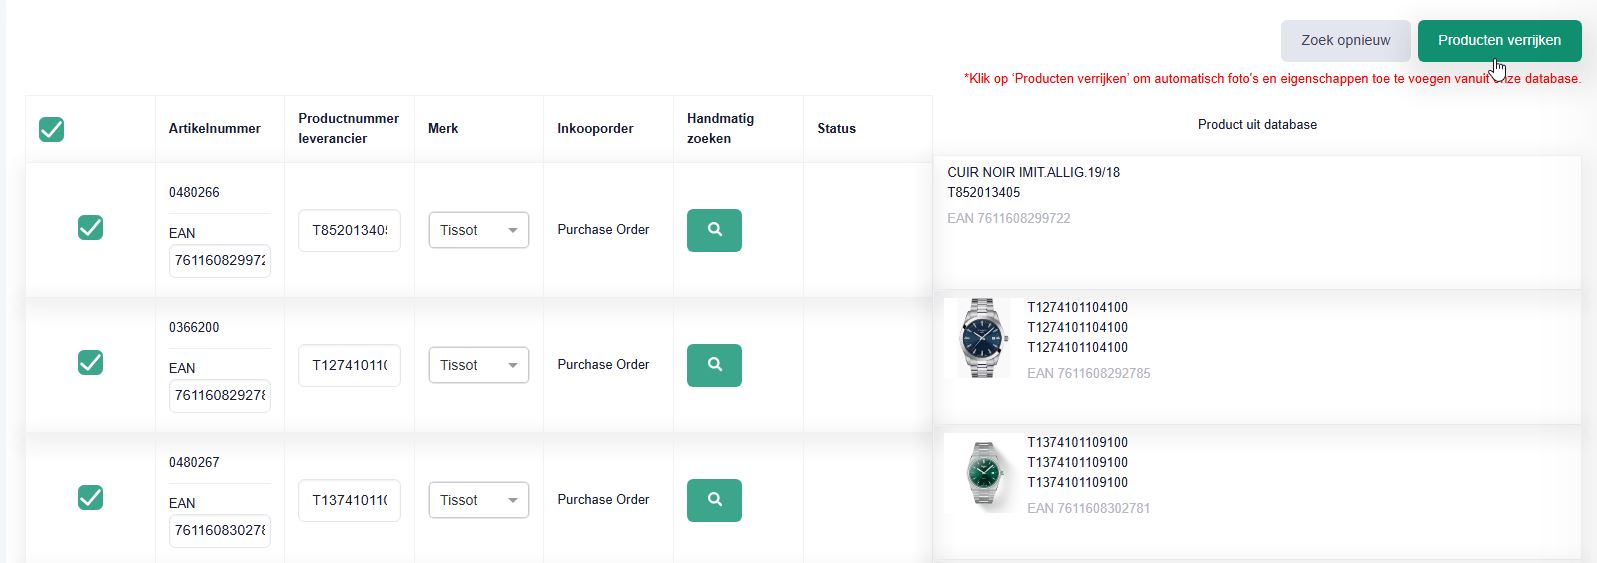
Click the 'Enrich products' button at the top.
Do you see products where the correct image is not displayed? You can disable these by unchecking the checkbox. Optionally, you can search for another product from the database to link via the Manual search column.
- 14
Then click the 'Open purchase order' button.
Wait until the loading icon has stopped (connecting the products), so that the pop-up appears with this button.
- 15
The purchase order will now appear, allowing you to make any further adjustments, increase stock, and print labels.
See the full process in this help article about booking in products.
Additional explanation for step 5
How the columns are arranged depends on the file. Therefore, the required actions may vary per invoice. If the information is not displayed correctly and it is an invoice that the supplier always provides in this way, please send the file with an explanation to support@prismanote.com. Our development team can then make adjustments for invoices from this specific supplier.
Interface explanation:
-
In the first row, the column type can be selected.
-
Via the 'Choose' field and the 'Apply action' button, you can make bulk adjustments directly.
-
By selecting a few columns or rows, the bulk adjustments are applied to this data.
- Click the field at the top of the column to select the correct data.
-
Click the 'Choose' button at the top and click 'Clean up text'.
-
Then click the 'Apply action' button.
It may happen that the sales price or purchase price is displayed without a dot or comma.
Therefore, take the following step.
- Select the option 'Add dots to price column' and click the 'Apply action' button.
Dots will then be added for the two decimal places.
With the options 'Mark records as...' it is also possible to select various rows as shipping costs or gift/display packaging.
Was this article helpful?
Another question?
Ask Linde — answers come with sources.